Build a standard third-person follow camera — pivot locked to a target actor, camera offset behind and slightly above, stick-driven yaw/pitch, soft collision pushback. By the end you'll have a single UComposableCameraTypeAsset that runs on any character and activates from a one-line Blueprint call.
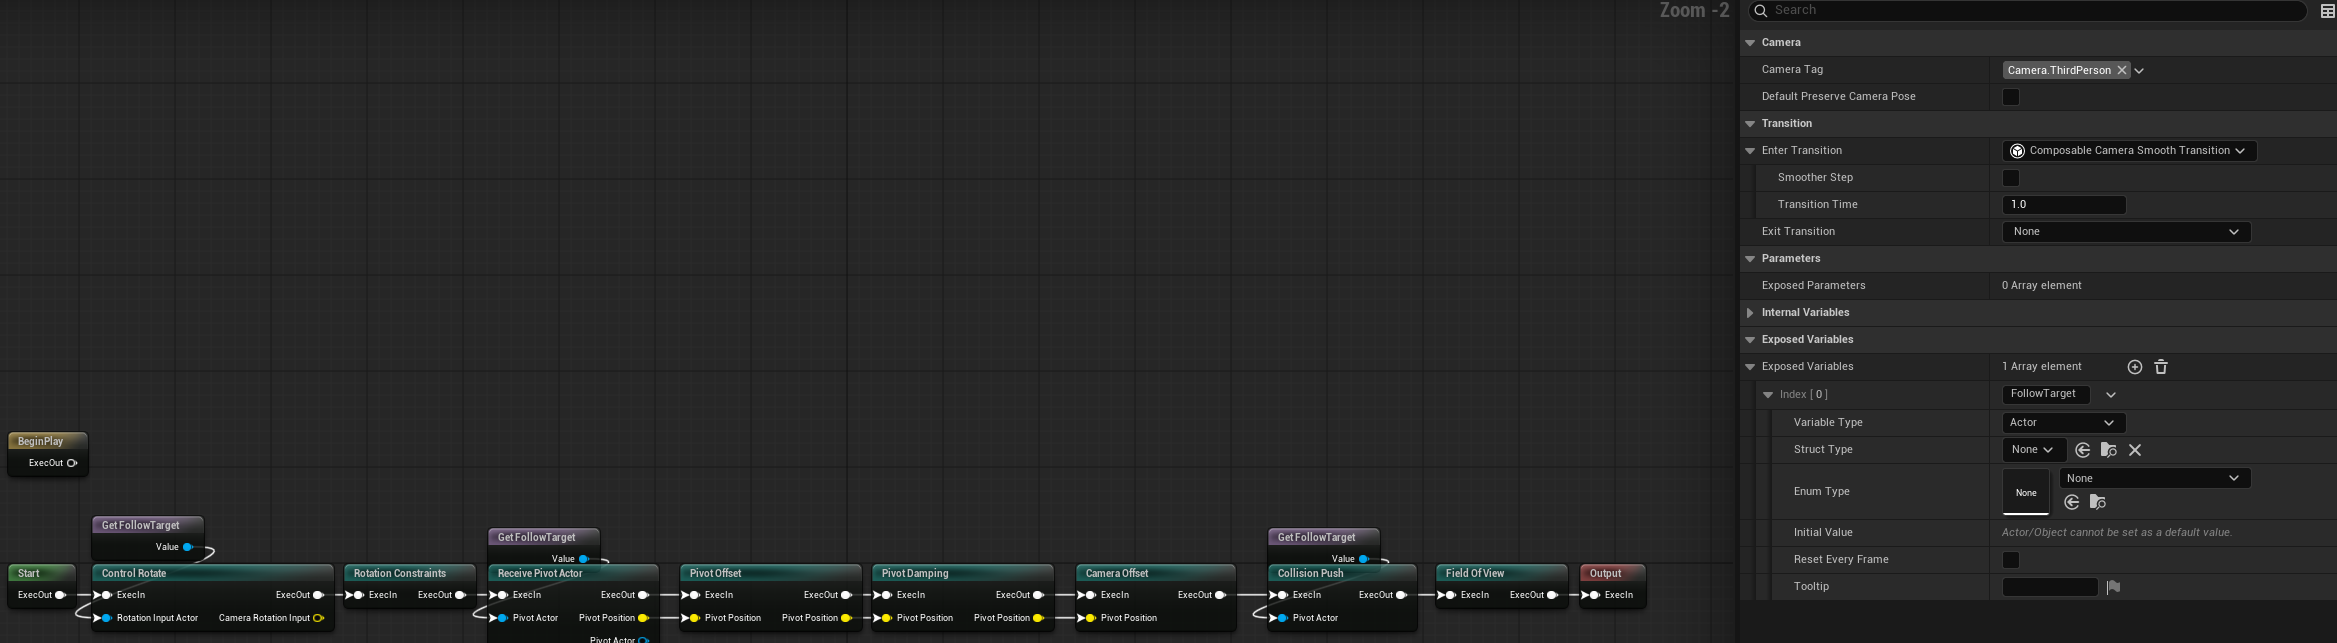
The chain we're building:
ReceivePivotActorNode        reads FollowTarget, publishes PivotPosition
  → ControlRotateNode        right-stick yaw + pitch input
  → RotationConstraints      pitch clamp
  → PivotOffsetNode          shoulder-height lift
  → PivotDampingNode         smooths pivot snaps (optional but recommended)
  → CameraOffsetNode         pushes the camera behind the pivot
  → CollisionPushNode        trace + self-collision pushback
  → FieldOfViewNode          author FOV
Each of these is a shipped node documented in the Node Catalog. The tutorial steps through authoring the asset, exposing parameters, wiring input, and activating it.
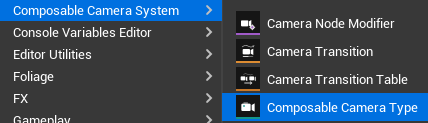
1. Create the type asset
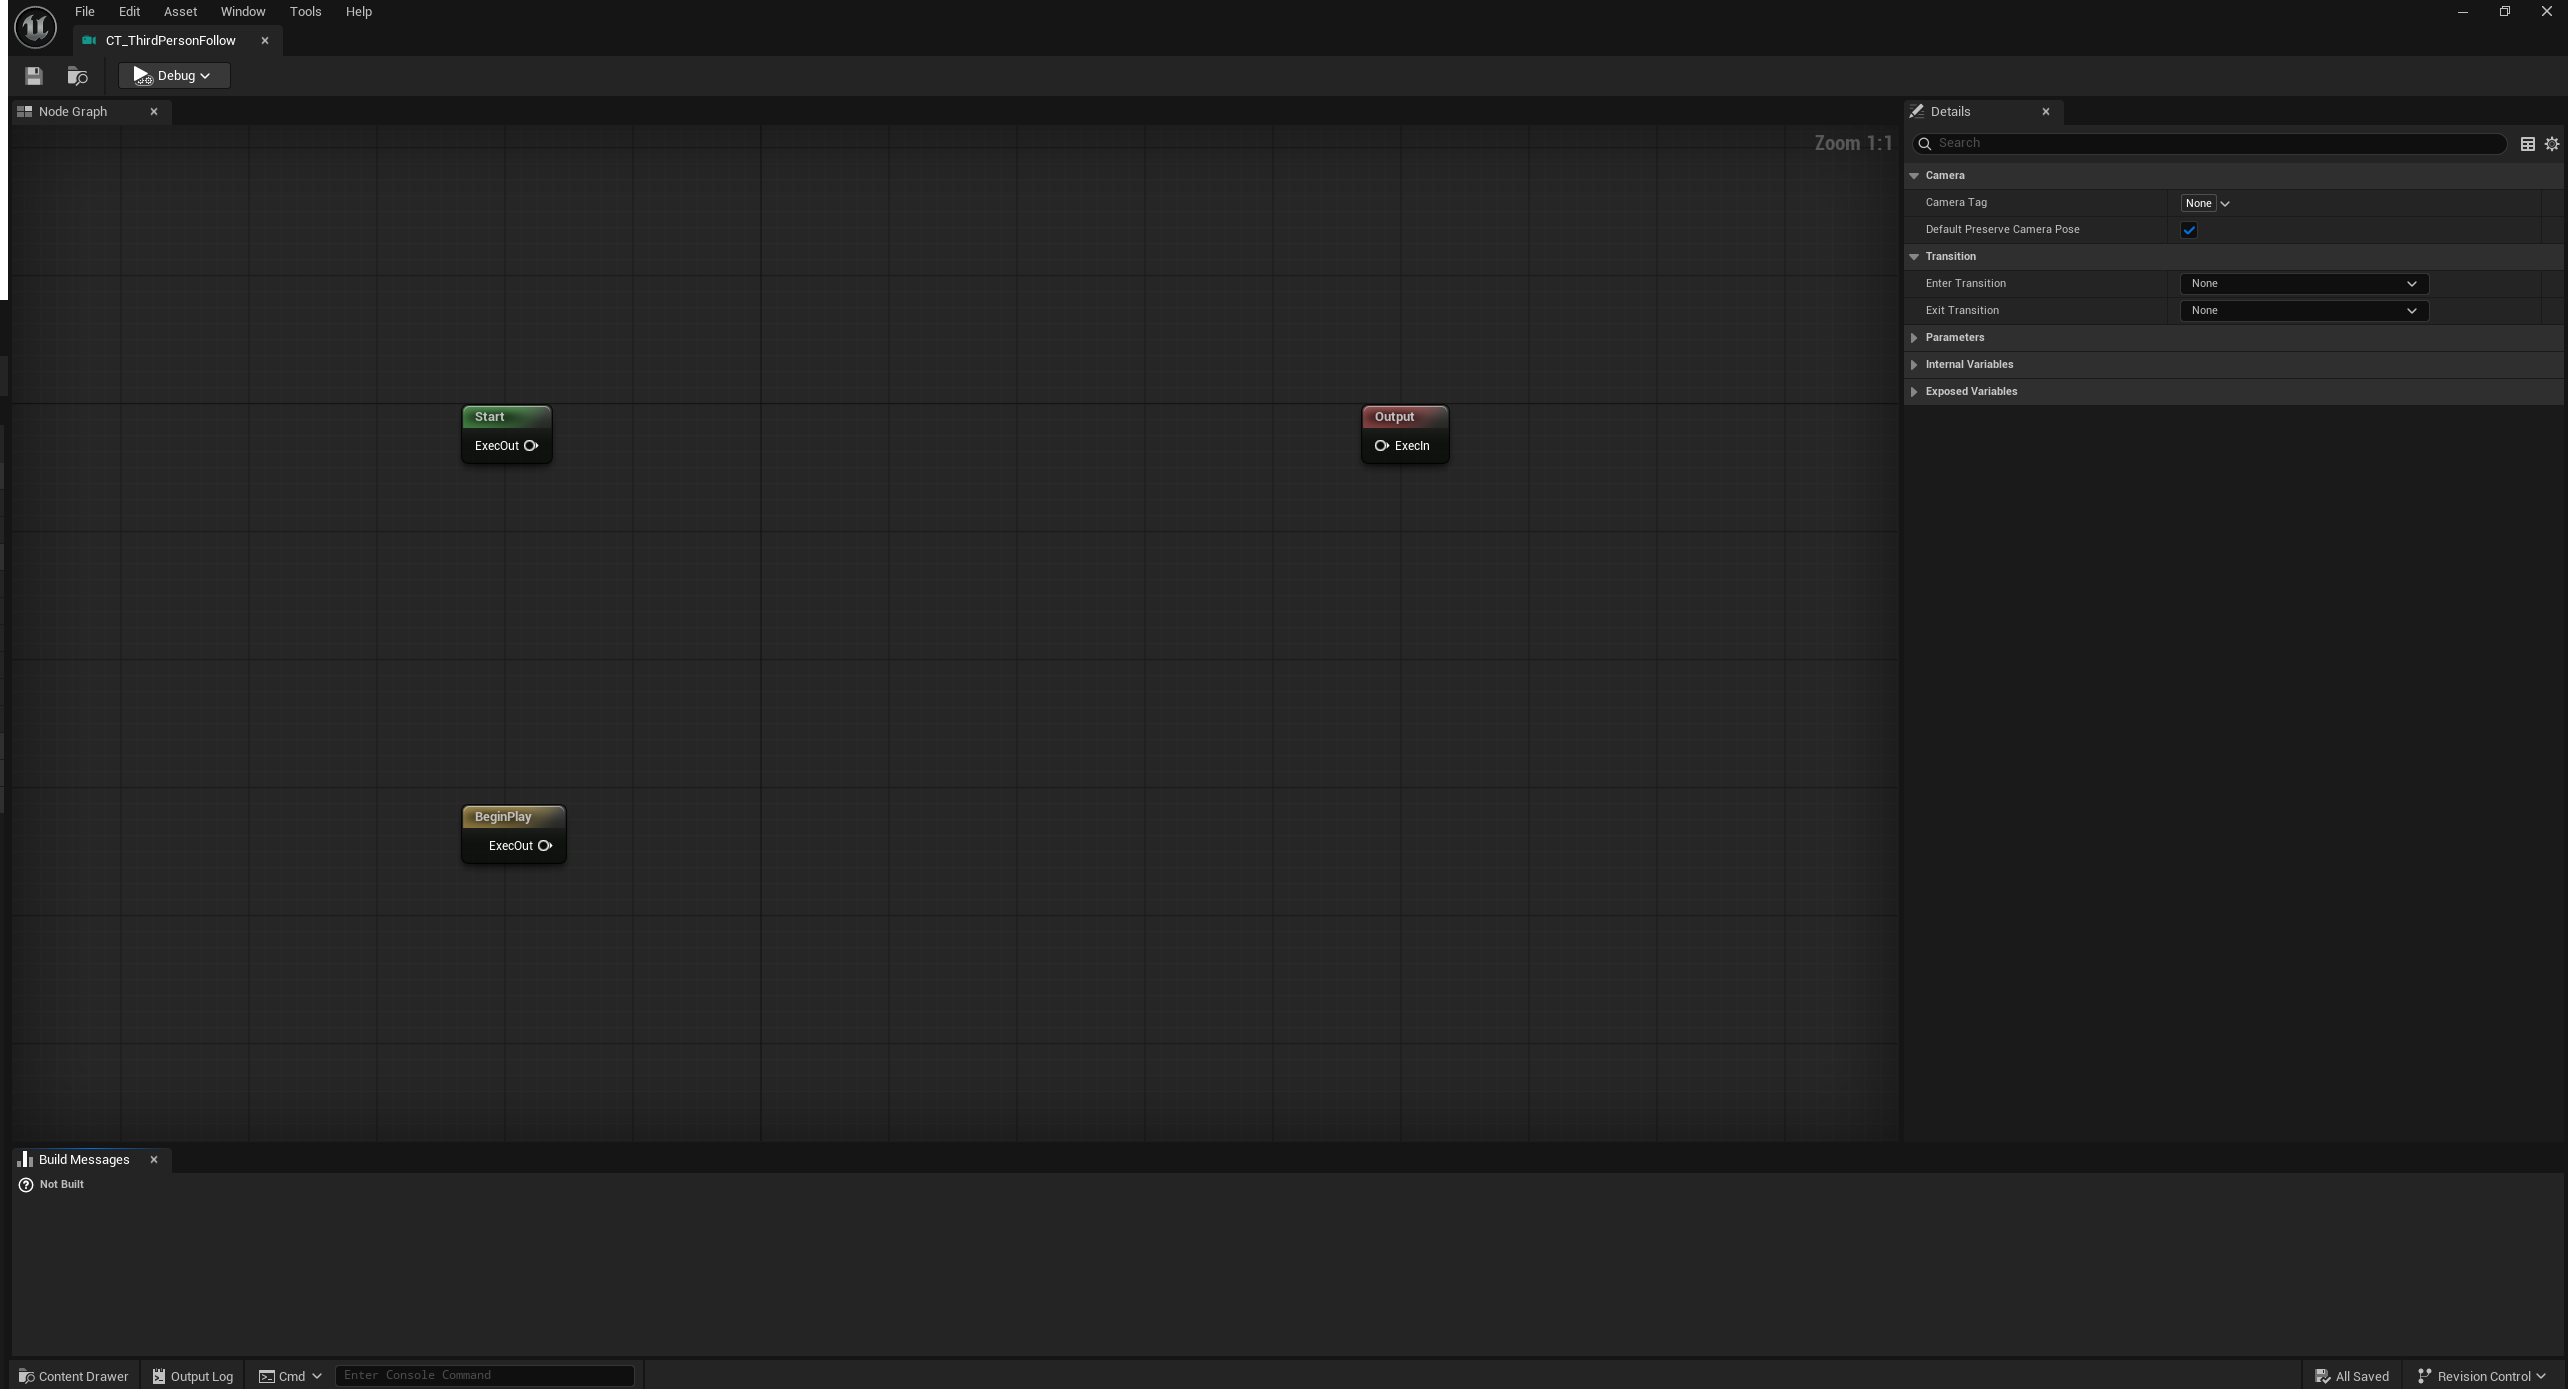
Content Browser → right-click → Composable Camera System → Camera Type Asset. Name it CT_ThirdPersonFollow. Double-click to open the graph editor.
The canvas starts empty with a single Output node on the right — that's where the final pose ends up each frame.
2. Declare a FollowTarget variable
A follow camera needs to know which actor to follow. We expose that as a context variable so callers can pass it in on activation.
If this camera will only ever follow the locally controlled player pawn, you can skip this variable and set the actor-source fields on ControlRotate, ReceivePivotActor, PivotOffset, and CollisionPush to Controller Controlled Pawn. The explicit FollowTarget variable is still the most portable setup, so the tutorial uses it.
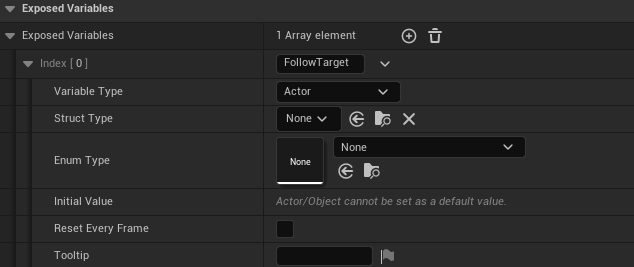
- Open the Exposed Variables panel (right side of the editor).
- Click + Add.
- Set Name to
FollowTarget, Type toActor Reference.
This variable now appears as a variable node in the palette and — crucially — it will become a pin on the Activate Camera K2 node in Blueprint.
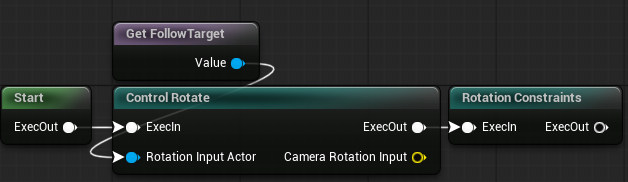
3. Stick-driven orbit
Drop a ControlRotate node. Wire FollowTarget into its RotationInputActor pin (the actor owning the EnhancedInputComponent). In Details:
RotationInputActorSource— leave atExplicitActorfor this tutorial, or switch toControllerControlledPawnif the possessed pawn owns the Enhanced Input component.RotateAction— yourIA_Lookasset (or whatever you use for right-stick look input). This must be anUInputActionwithAxis2Dvalue type.HorizontalSpeed/VerticalSpeed—1/1are reasonable starting values.HorizontalDamping=(0.05, 0.1)— a short acceleration, slightly longer deceleration.VerticalDamping=(0.05, 0.1).bInvertPitch— toggle to taste.
Enhanced Input dependency
ControlRotateNode reads input via the Enhanced Input system. If EnhancedInput isn't already in your project's module dependencies, add it to your Build.cs — otherwise the node compiles but reads no input at runtime.
Now drop a RotationConstraints node after it. Set PitchRange to (-40, 40) so the player can't look straight up or down into the floor.
4. The pivot chain
Drop these three nodes onto the canvas, left to right:
- ReceivePivotActor — wire
FollowTargetinto itsActorinput. - PivotOffset — set
OffsetSpaceto Actor Space,Offsetto(0, 0, 80)for shoulder height. Wire the receive node'sPivotPositionoutput into the offset node'sPivotPositioninput. - PivotDamping — add an Instanced
IIRInterpolatorin itsInterpolatorslot,Speed = 1,bUseFixedStep = true. Wire the previous node's output in.
The three nodes handle what point the camera is tracking. They don't touch camera position or rotation yet.
ReceivePivotActor and PivotOffset both have actor-source fields. Leaving them on ExplicitActor keeps the graph driven by FollowTarget; switching them to ControllerControlledPawn removes the need for the variable in a pawn-only gameplay camera.

5. Camera offset
Drop a CameraOffset node. Set:
Offset=(-400, 50, 20)— 4m behind, slightly right, slightly above the pivot.
Wire the previous node's output pose into its input. The camera now sits at a fixed offset from the pivot, but still points at wherever it was pointed when the tree was built (usually world origin).

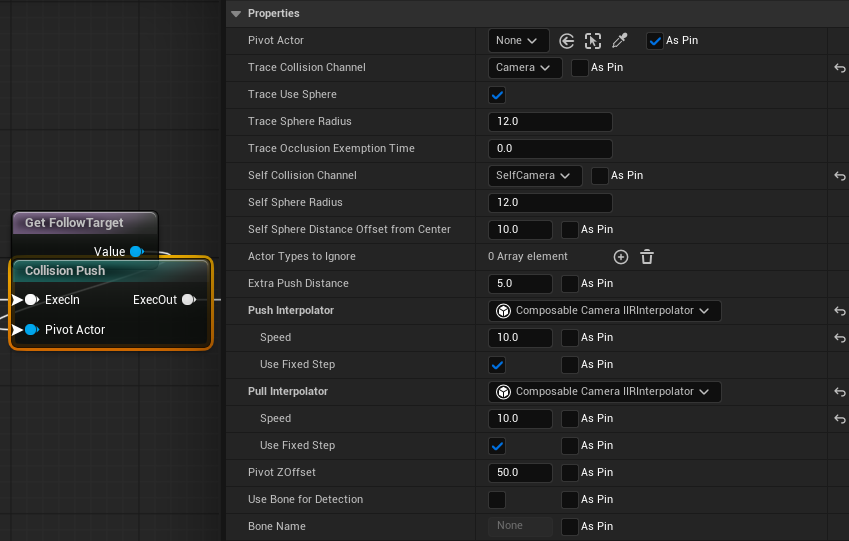
6. Collision
Drop a CollisionPush node. This is the largest single node in the shipped set — it handles two collision modes simultaneously:
- Trace collision — a line/sphere trace from pivot to camera each frame; if something blocks it, the camera is pushed toward the pivot along the trace direction.
- Self collision — a sphere around the camera; if something overlaps it, the camera is pushed to the far side via a reverse sphere sweep from beyond the camera back toward the pivot.
Starting values:
TraceUseSphere = true,TraceSphereRadius=12.SelfSphereRadius=12.TraceCollisionChannel=Camera(orVisibility, depending on your project),SelfCollisionChannel = SelfCamera(depening on your project),- For both modes, the push/pull interpolators default to
IIRInterpolator. SetPushInterpolator.Speed = 10andPullInterpolator.Speed = 10— fast push on occlusion, slow return so the camera doesn't bounce.
Leave PivotActorSource on ExplicitActor when following the tutorial's FollowTarget variable, or switch it to ControllerControlledPawn for a pawn-only gameplay camera.
7. Author FOV
Finally, drop a FieldOfView node. Set FieldOfView = 70. Wire its output into the Output node's Pose input.
8. Save and build
Ctrl+S. The asset header should show a green checkmark. If it's red, hover for the error — typically an unconnected exec pin or a dangling parameter reference.
The final graph looks like a straight pipeline: parameter → 8 nodes → Output.
9. Activate from Blueprint
Open your character Blueprint. On BeginPlay:
- Right-click → search Activate Camera. Place the node.
- Set Camera Type Asset =
CT_ThirdPersonFollow. The node rebuilds its pins — you'll see aFollow Targetpin appear (generated from your parameter). - Wire the character's
SelfintoFollow Target, andPlayer Index=0. - Connect the exec pin from
BeginPlay.
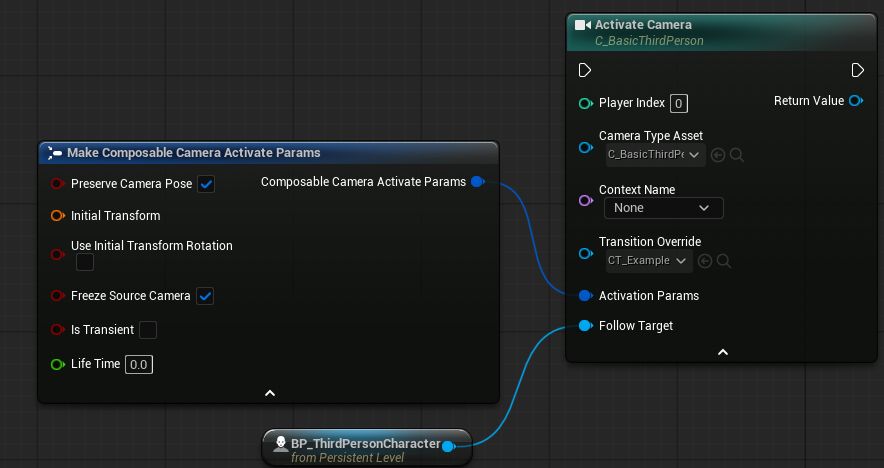
That's the entire activation path. Compile, play, and the camera snaps to your character with stick-driven orbit and collision-aware pushback.
Tuning notes
A few things to nudge once you see it running:
- Camera feels "sticky" behind the character — increase
HorizontalDamping.Y(deceleration time) onControlRotateNode, or lowerSoftLookAtWeightonLookAtNode. - Camera snaps through thin walls — you're relying on trace collision only. Enable self collision and increase
SelfCollisionRadiusuntil the camera stops poking through. - Pitch feels sluggish near the clamps —
RotationConstraintsis a hard clamp; if you want softer approach, author a custom node that smoothstops near the range endpoints, or set a wider pitch range and let content design the limit. - Camera jitters while the character is on a moving platform — add a second
PivotDampingafter the offset, and lower the spring damp time to~0.08. The source of the jitter is usually high-frequency root-bone motion during animation blends.
Where next
- Transitions & Blending — author an
EnterTransitiononCT_ThirdPersonFollowso activation blends in rather than snaps. - Modifiers — add a sprint-FOV-bump modifier that targets
FieldOfViewNodeon this camera's tag set. - Cutscene Context — the next tutorial, which pushes a cutscene over this camera and blends back to it cleanly.