A camera type asset (UComposableCameraTypeAsset) is the data-driven description of one camera. It owns a graph of nodes, the exposed parameters callers can set when activating it, any camera-scoped variables its nodes read and write, and the transition the system uses when entering or leaving it by default. There is no camera subclassing — the same base AComposableCameraCameraBase class is spawned for every type and populated from the asset at runtime.
This page walks through authoring one from scratch.
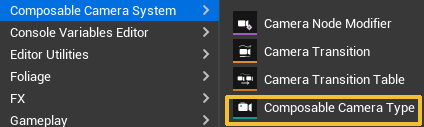
Creating the asset
In the Content Browser, right-click → Composable Camera System → Camera Type Asset (or use Add → Composable Camera System → Camera Type Asset). Name it with a consistent prefix so assets are easy to find — the conventions in the shipped content use CT_ for Camera Type (e.g. CT_ThirdPersonFollow, CT_OrbitAim, CT_TopDown).
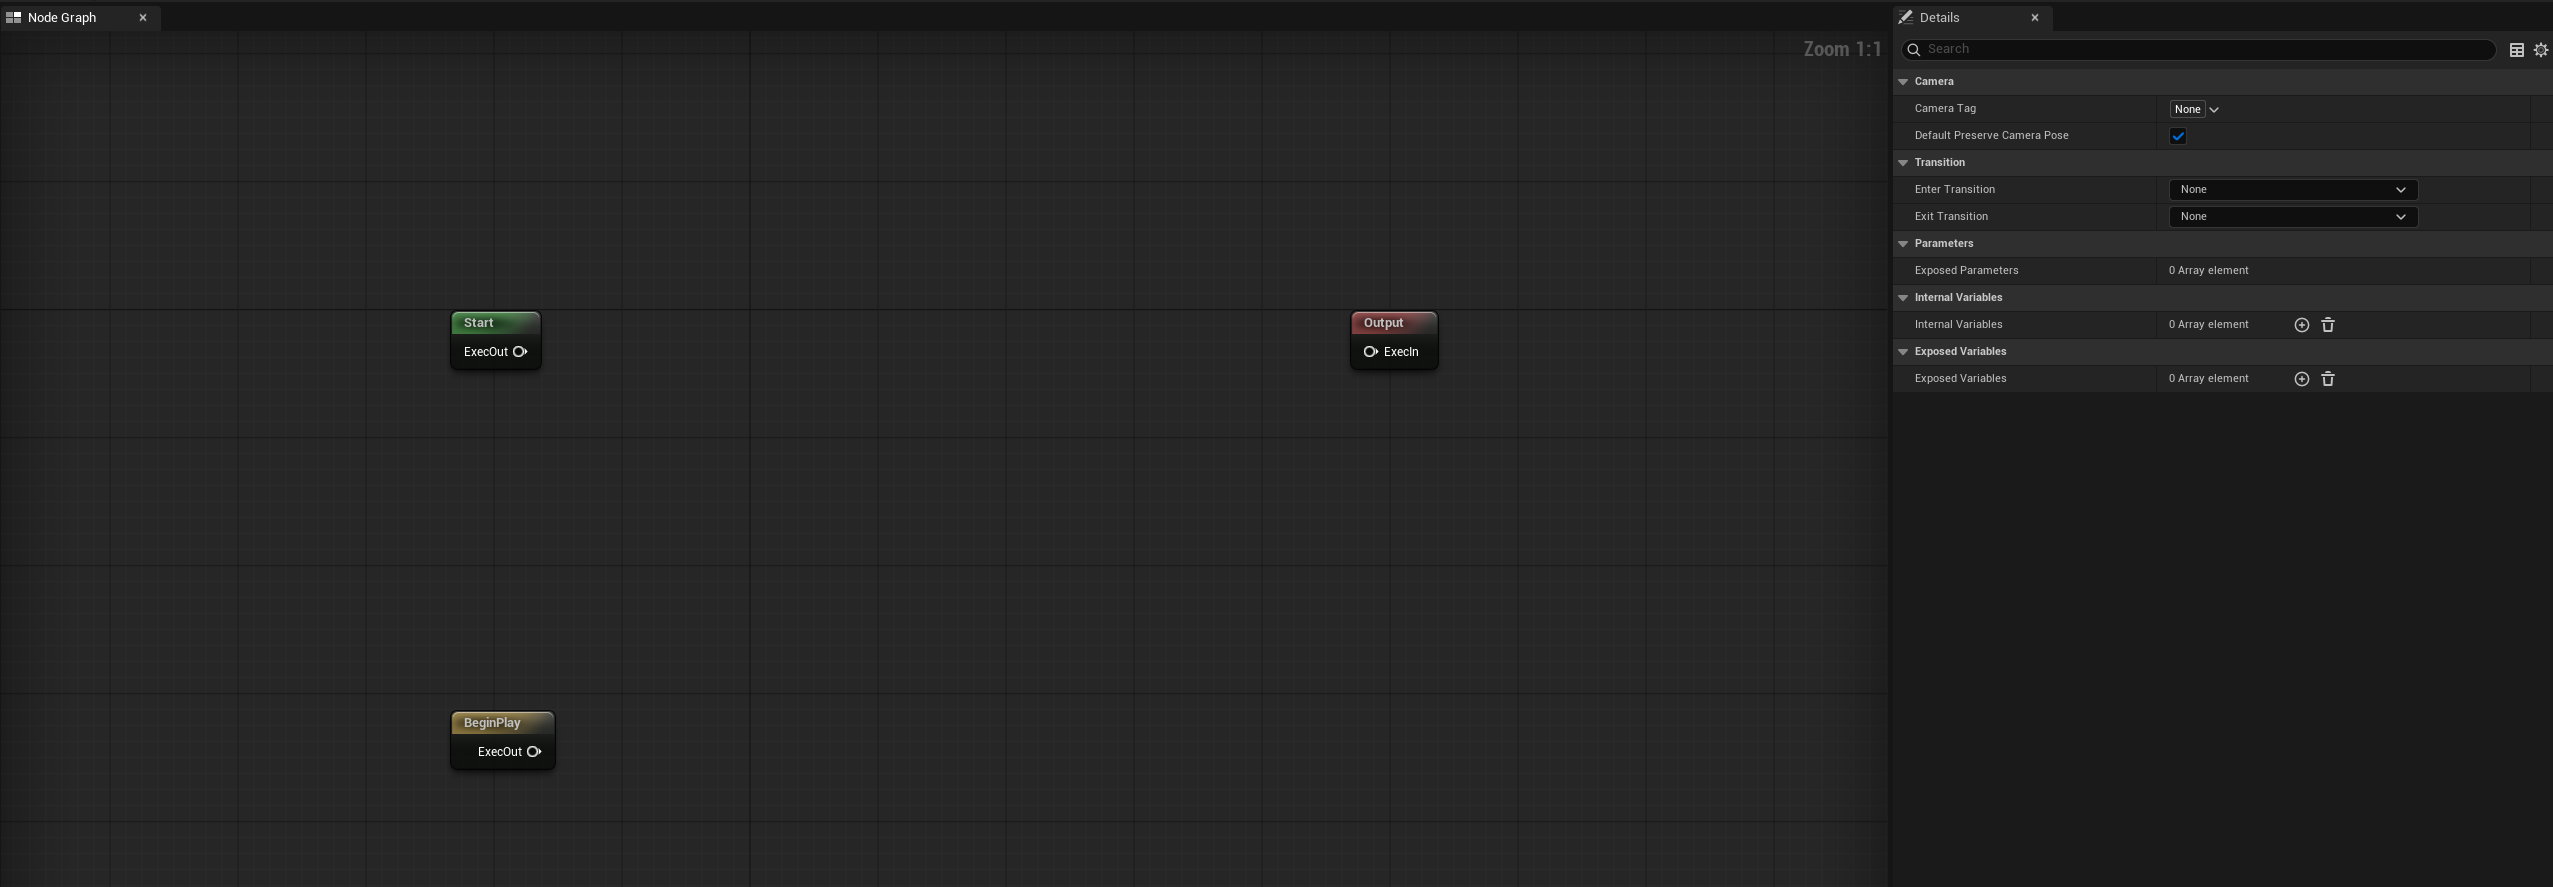
Double-click the new asset to open the camera type editor. You'll see an empty graph with two sentinel nodes pre-placed: a Start node and an Output node. The Start node has no inputs; the Output node has a single exec input and represents the pose handed back to the director at the end of the frame. Every camera's per-frame execution chain begins at Start and ends at Output.
Placing nodes
Right-click on the empty canvas to open the context menu. Under Camera Nodes you'll find every non-abstract UComposableCameraCameraNodeBase subclass the engine knows about — built-in nodes like ReceivePivotActor, PivotOffset, CameraOffset, LookAt, FieldOfView, plus any Blueprint-authored nodes in the project.
The node catalog in Reference → Nodes describes each one. For a first third-person rig, a reasonable composition is:
Start
  → ControlRotateNode          orbits the camera with player input
  → ReceivePivotActorNode      reads the follow target and publishes its position
  → PivotOffsetNode            lifts the pivot to shoulder height
  → CameraOffsetNode           offsets the camera behind and to the side
  → CollisionPushNode          pushes in on wall collisions
  → FieldOfViewNode            sets FOV in degrees
Output
Drop nodes in roughly the order above and drag the exec pin from Start → first node → next → … → Output. The exec wire is the per-frame execution chain; each node reads the pose produced by its predecessor and writes a modified pose forward.

For pawn-centric gameplay cameras, actor inputs on nodes such as ReceivePivotActor, ControlRotate, PivotOffset, and CollisionPush can be sourced directly from the controller-controlled pawn. Use explicit actor pins or exposed variables when the camera should follow a non-possessed actor, run in Sequencer, or be reused outside a player-controller context. See Actor Input Sources.
Exec order matters
Nodes run in strict exec-wire order. For example, a LookAtNode that runs before CollisionPushNode makes the camera face the target before being pushed by a wall; reversing the order makes the camera face the target after being pushed. Neither is wrong — they give different feels. If a node's behavior surprises you, the first thing to check is where it sits on the exec chain.
Control Rotation node always places first
The Control Rotation should almost always be placed before any other position-altering nodes, e.g., the Pivot Damping node.
Data pins vs exec pins
Every node has two kinds of pins.
Exec pins (the white triangles at top-left and top-right) define the execution order. Each node has at most one exec-in and one exec-out, and the chain is strictly linear — no branching, no loops.
Data pins (the coloured circles on the sides) are how nodes pass typed values to each other. An output data pin on one node can wire into an input data pin on another; the input reads whatever the source wrote this frame. Common patterns:
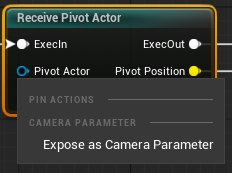
ReceivePivotActorNodehas an output pinPivotPosition(Vector3D). Wire it into thePivotPositioninput onPivotOffsetNode, and the offset node acts on the pivot the receive node just published.ControlRotateNodehas outputs likeYawandPitch(Float). Wire them into other nodes that need to know the current orbit rotation.
Data wires can go in any direction between camera nodes as long as types match — Float to Double is allowed (the engine treats them as interchangeable under PC_Real), Struct pins must carry the same USTRUCT, Object pins follow inheritance rules. The schema will refuse incompatible wires and tell you why in a tooltip.
Exposing parameters
Most camera behaviour should not be hard-coded into the asset. A third-person rig that targets one specific actor is useless for anyone except that actor; a rig that exposes FollowTarget as a parameter works for every character.
To expose an input pin:
- Right-click the pin.
-
Select Expose as Camera Parameter.
 Three things happen:
 -
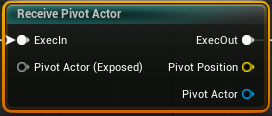
Any existing wire to the pin is removed (exposing and wiring are mutually exclusive — a pin is either driven by a wire, exposed to callers, or left at its authored default).
- A new entry appears in the type asset's Exposed Parameters list (visible in the Details panel when no node is selected).
- The pin renders in grey with an
(Exposed)suffix, marking it as no longer wireable.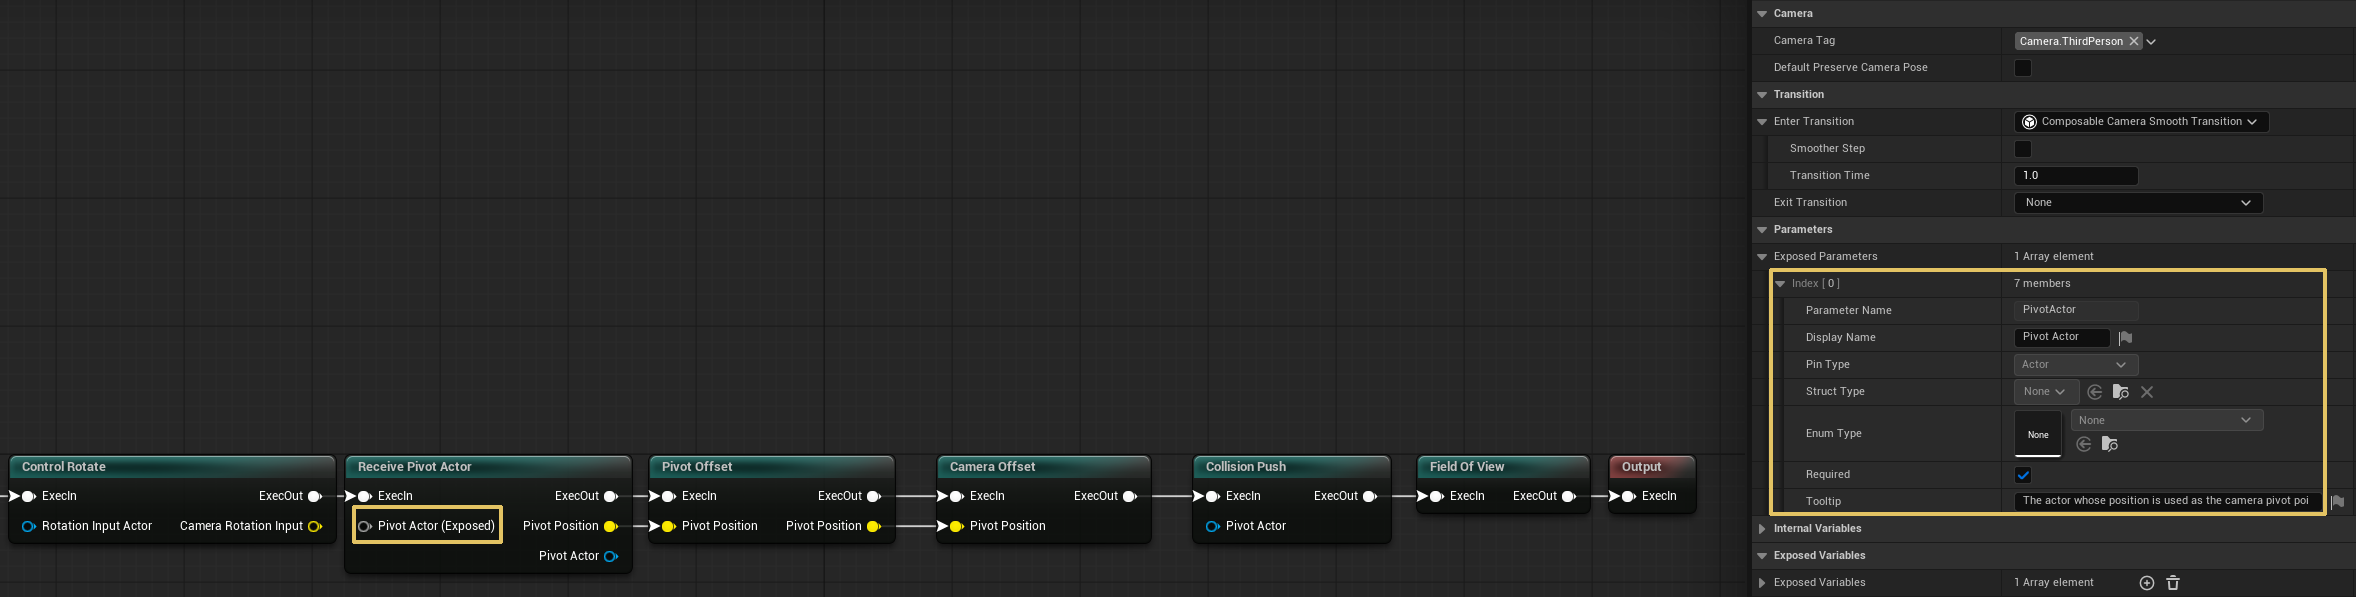 The exposed parameter inherits its display name, tooltip, and
 bRequiredflag from the C++ pin declaration on first exposure — from that point on, per-asset values are the source of truth. You can edit display name, tooltip, and required-ness in the Details panel without touching the underlying node.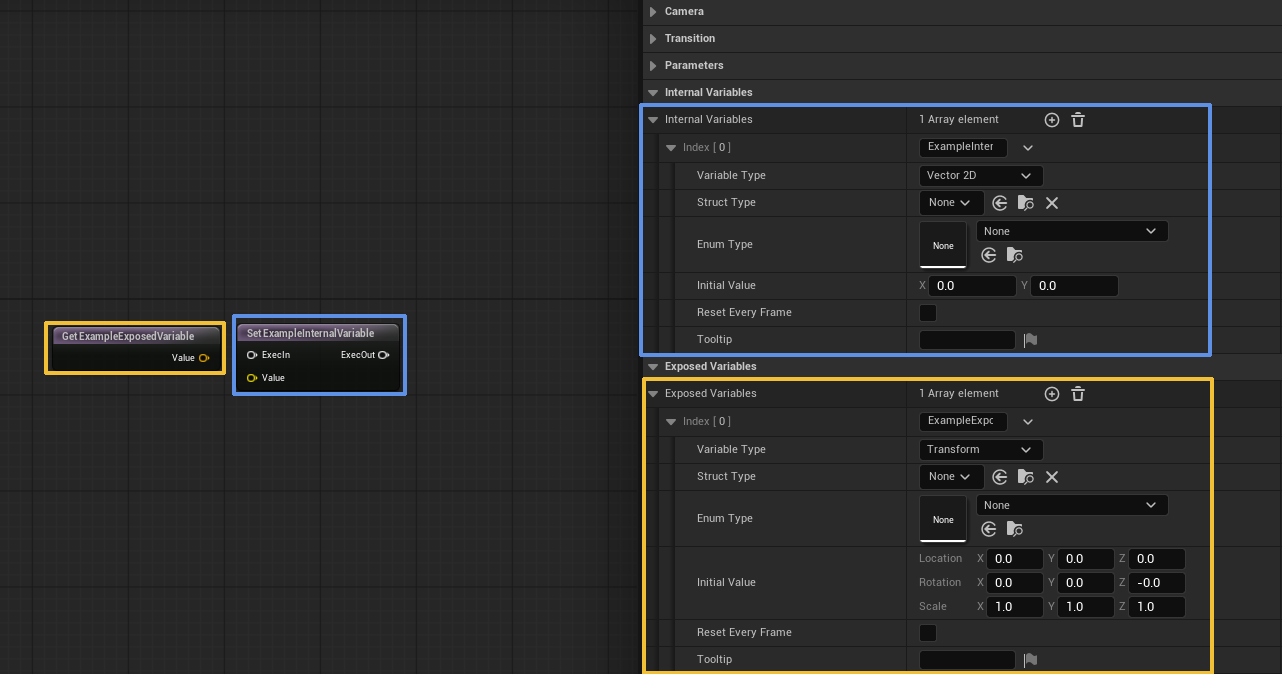
Parameter names are identity
ParameterName is the lookup key every consumer uses: K2 node pins, DataTable rows, parameter blocks, the row editor's orphan detection. Renaming a parameter via the Details panel is deliberately forbidden — if you need a different name, unexpose the pin and re-expose under the new name. Every caller that referenced the old name will then surface as a broken pin or an orphan entry, which is exactly what you want (silent name drift is worse than a visible break).
Exposed parameters are one-shot inputs: the caller's value is applied once at camera activation and persists unchanged for the camera's lifetime.
Camera-level variables
Some camera behaviour needs to accumulate state across frames, or share a value that multiple nodes read without drawing a web of data wires. That's what variables are for.
Two flavours, both authored in the Details panel under their respective arrays:
- Internal Variables — the caller cannot touch them. Initial value comes from the
InitialValueStringyou type in. Reset every frame by tickingbResetEveryFrame, or persist across frames by leaving it off. - Exposed Variables — the caller may override the initial value at activation, through the same parameter-block keyspace as exposed parameters. If the caller omits the value,
InitialValueStringis still the fallback.
Both read and write from the graph through dedicated Get and Set variable nodes. Right-click the canvas → Variables → Get → Internal → {var} (or Exposed / Set). Get nodes are pure data conduits — no exec pins; wire their output into a camera node's input. Set nodes have an exec pair — splice them into the Start→…→Output chain at the point where the write should happen, and wire a source value into the Set's input pin.
The practical difference between "wire a pin" and "Set a variable" is persistence. A wired pin is evaluated fresh every frame and discarded; a variable persists until overwritten (or until the camera is destroyed). A damping node that wants to blend from "last frame's smoothed value" to "this frame's raw value" needs a variable — a wire can't carry frame-to-frame state.
When to expose vs keep internal
A variable should be exposed only if callers have a reason to seed different initial values on different activations. If a variable's initial value is a property of the camera type itself (e.g. an internal "smoothed yaw accumulator" that always starts at the character's yaw), keep it internal — exposing it pollutes the K2 node's parameter list for no benefit.
Typical compositions
Beyond the third-person rig above, a handful of common shapes:
Top-down / strategy camera:
ReceivePivotActor (player unit centroid)
  → PivotDamping    smooth pivot changes
  → CameraOffset    fixed offset above and behind
  → OrthographicNode  switches to orthographic, authors width
  → FieldOfView     (harmlessly no-op under ortho, but keeps pose consistent)
Spline / rail camera:
SplineNode        places the camera on a rail
  → LookAtNode (hard)  lock orientation to target
→ FieldOfViewSplineNode's built-in spline backend — see the Node Catalog for which spline types it supports (Hermite, Bezier, Catmull-Rom, or the engine's USplineComponent).
Cinematic level sequence camera:
For level-sequence-driven cinematics, use the Play Cutscene Sequence Blueprint node instead of authoring a camera type asset. It handles context pushing, LS playback, CameraCut-driven camera switching, and cleanup in a single call — no manual camera composition needed.
Aim / zoom camera (typically activated on a context push during ADS):
ReceivePivotActor
  → PivotOffset (tighter shoulder)
  → CameraOffset (shorter boom)
  → ControlRotateNode (slower input rate — use a modifier on top)
  → FieldOfView (zoomed)
The aim camera is typically pushed onto a Aim context (see Context Stack) so releasing ADS pops back to whatever gameplay camera was running. Add a short inertialized transition as its EnterTransition for a natural "snap in, snap out" feel.
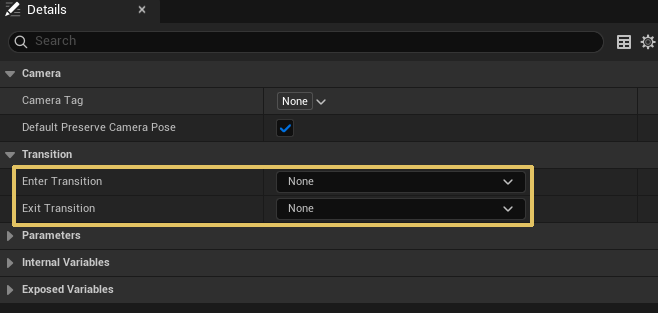
Setting the default transition
Open the type asset, select the empty canvas (so the Details panel shows the type asset itself), and find the Transition section. Populate EnterTransition with an instanced transition object — InertializedTransition is a good default for most gameplay cameras, with TransitionDuration around 0.3–0.6 seconds. See Transitions & Blending for how this interacts with the rest of the resolution chain.
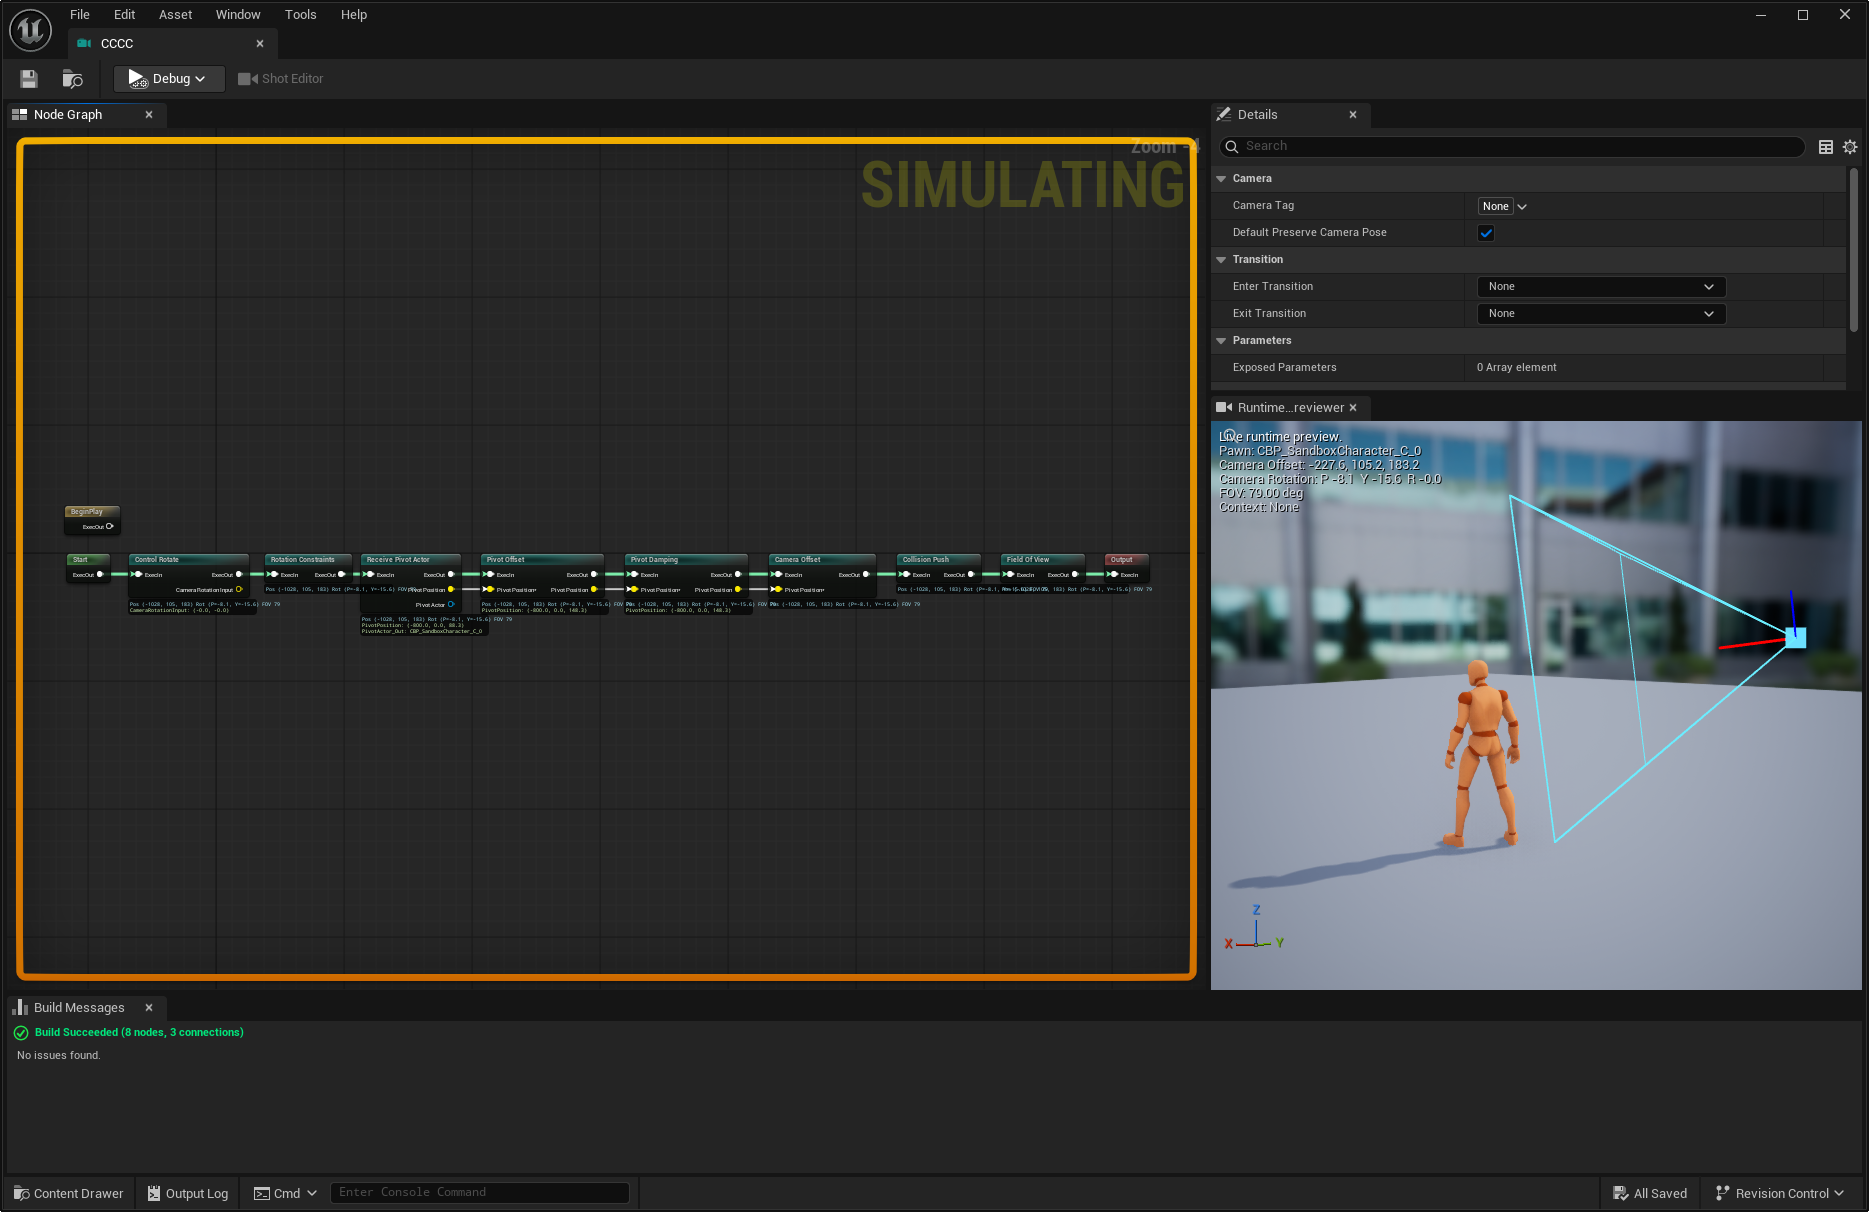
Runtime Previewer
When the asset is running in PIE, open Window -> Runtime Previewer from the Camera Type Asset editor to inspect the live pawn/camera relationship in a docked preview viewport. The tab uses the same toolbar Debug picker as graph debug overlays, so bind a matching runtime camera instance first.
The previewer keeps the controlled pawn around the preview origin, mirrors skeletal pose when possible, and draws the runtime camera marker, frustum, movement arrow, FOV, context name, and active-camera state relative to that pawn. Dragging in the previewer only moves the editor observer camera; it does not move the PIE pawn or change the runtime camera result.
Saving and building
Saves are standard Ctrl+S. On save, the editor runs a Build pass that validates the graph: checks for missing exec wires, type mismatches on data pins, orphaned exposed-parameter entries, and so on. The Build Messages tab at the bottom of the editor shows results. A warning here doesn't block the save, but a red error does — fix the error before relying on the asset at runtime.
Once the asset compiles cleanly, it's ready to be referenced from a K2 Activate Camera node, a DataTable row, or C++ — see Blueprint API for the activation side.